

How To Import An Image File Into An Indesign Template
5 Different ways to place images in to Adobe InDesign
When placing images or any external content in to Adobe Indesign there are many different options, here we are going to go through the 5 most useful ways yous tin place images in to Adobe InDesign.
i) Placing one image at a time
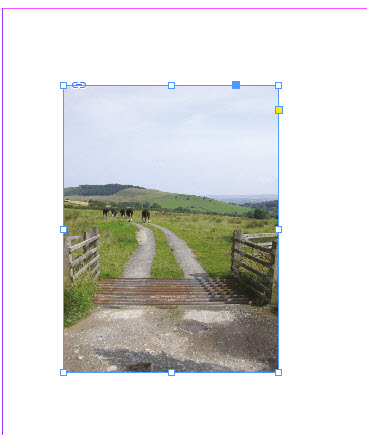
To place whatsoever paradigm in to Adobe InDesign we offset need to go to File>Place and notice the image nosotros want to import.
We will then have a loaded cursor with a preview of the prototype on the end of it. There are two means nosotros tin now place the image in to Adobe InDesign we tin can either just click in one case and the image is placed in at its full size or we tin click and elevate to control the size of the paradigm every bit it is being placed in.
2) Placing multiple images in to Adobe InDesign at the aforementioned time.
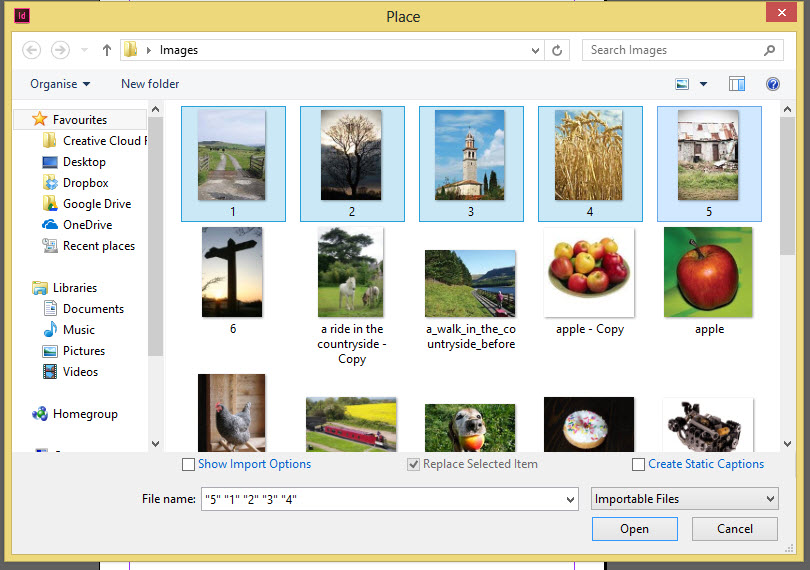
This time we are going to load our Adobe InDesign cursor with a number of different images to place in rapidly i later on another. First we go to File>place every bit previous. Then at the prototype selection window nosotros are going to hold down our shift central and select our images adjacent to each other, if the images we wish to select are not side by side to each other nosotros tin press the Control or Command primal and select random images.
3) Placing images in to Adobe InDesign frames that have already been created.
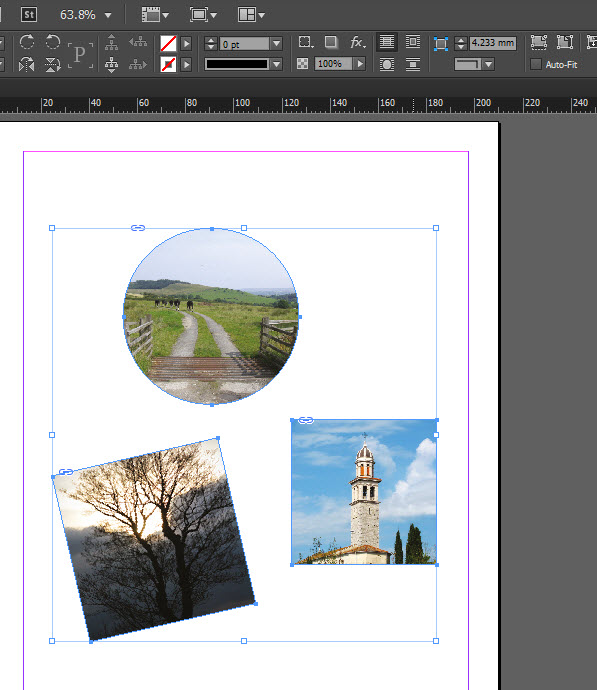
In that location may be instances when we have already placed blank frames on to the Adobe InDesign page, for example if nosotros wanted the image to be placed in a circle or a different shaped InDesign frame that we have drawn with the Pen tool or created with InDesigns pathfinder panel.
In one case we take created the frames on the Adobe InDesign page nosotros can go to File>identify choose the images we wish to identify in to InDesign then with the cursor loaded with the images click on the created frames and the images will exist placed in to the frames on the Adobe InDesign page.
4) Placing images in to Adobe InDesign in a grid formation
To place images in to a grid formation in Adobe InDesign we are going to become to File>Identify and select a number of images, and then when we come back to the Adobe InDesign folio we are going to click and elevate as if we are just placing one image but before we let go of the mouse button we are going to use our cursors on the keyboard, if we printing the right cursor it will preview more frames to the correct and if nosotros press the up cursor it will increase the number of Adobe InDesign frames above, we can also reduce the number of frames downwards past pressing left and downwards cursors. When you have the correct number of frames previewed for the amount of images you have to place permit go of the mouse and all the images will appear in these frames. You will want to printing the 'Fill up frames proportionately' in your control bar to become the images fitting more than comfortably in your Adobe InDesign frames.


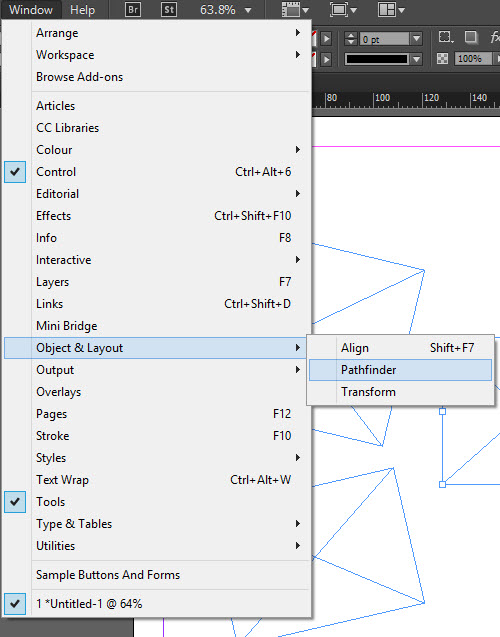
5) Placing images in to Adobe InDesign using compound paths
This time we are going to use our Adobe InDesign pathfinder panel which can exist found Window>Object & Layout>Pathfinder.
We are going to create numerous frames on the Adobe InDesign page making sure none of them are touching or overlapping. Then selecting all the frames together nosotros are going to click on the add together button in our Adobe InDesign pathfinder panel. This volition create a chemical compound path essentially treating all the frames every bit 1.
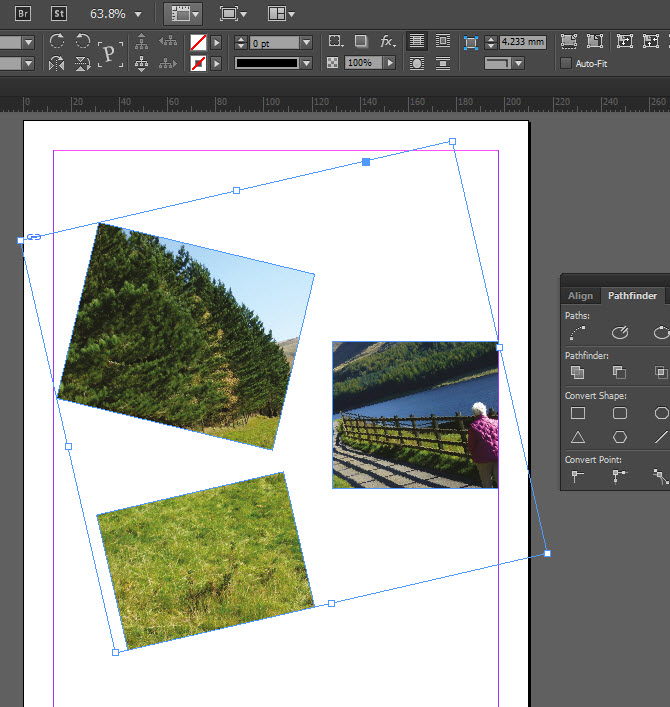
With this compound path selected go to File>Place and choose an image, the image will be displayed behind all the frames you will want to click fill up frame proportionally in the control bar to get the image to fit comfortably.

How To Import An Image File Into An Indesign Template,
Source: https://creativestudiosderby.co.uk/5-ways-to-place-images-adobe-indesign/
Posted by: bushnellmaidest.blogspot.com
0 Response to "How To Import An Image File Into An Indesign Template"
Post a Comment